


 The focal point of a picture is where you want to draw your viewer’s attention; it is the subject, the story of the photograph. It may also be the focus point—the point of sharpest focus—but, for this lesson in composition, I want you to think about where you want to the viewer to look, what you are trying to say with your photo. Organize the frame so that your viewer cannot help but see your focal point.
Surround the focal point with supporting elements that contribute to the story without overwhelming it or distracting from it. Remember our last lesson, in which we juxtaposed physical elements to create a framing structure. Now let’s be sure the eye goes to the focal point within that structure, and that the other elements support it.
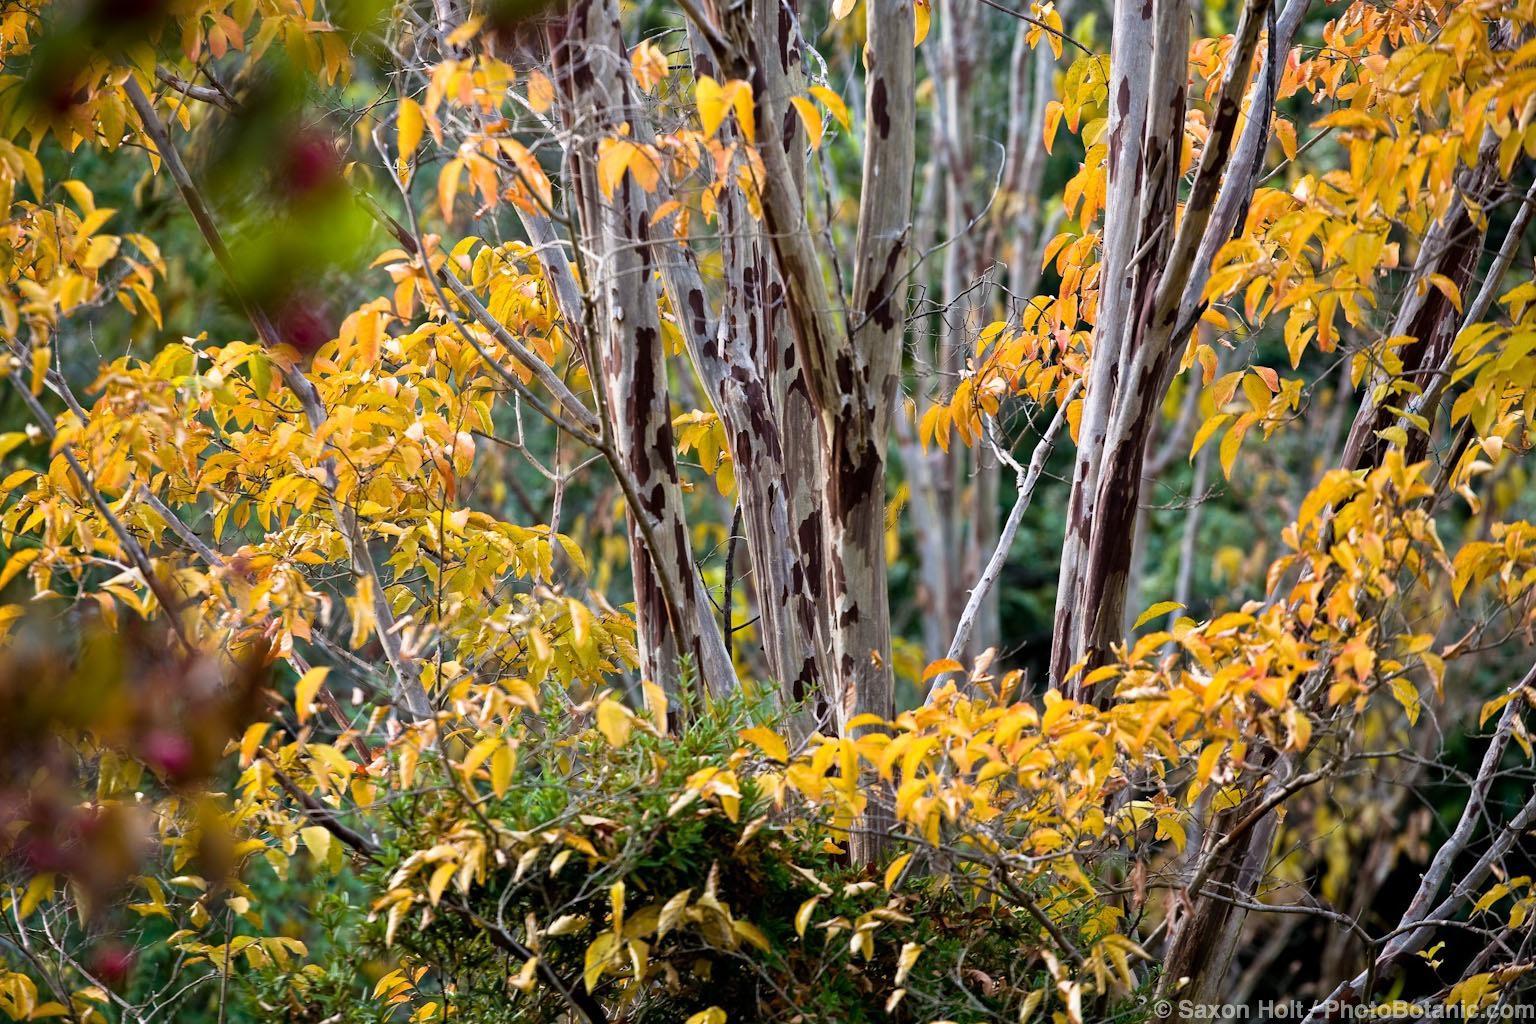
Below is another fall photo with yellow foliage surrounding the subject, but here the focal point is the wonderful exfoliating bark of the crape myrtle tree (Lagerstroemia subcostata) at Quarryhill Botanical Garden.
For every picture and every photographer, there will likely be numerous ways to fill frame and surround a focal point. In each situation, conscious decisions will help you develop your own style and make a good photograph out of a casual snapshot. In the picture of the San Francicso Japanese Tea Garden that opens this lesson, the red pagoda is the focal point where the eye falls; the pagoda rises tall against the yellow autumn foliage of a ginkgo tree, even though the tree is the larger element. Because the red is nestled in the yellow, it stands out.
It is natural in a photo for the eye to gravitate to structures more than to the plants. This is a key point to remember in garden photography. When you want the focal point to be a plant, be careful not to let even a small garden structure draw the eye away from where you want it. The focal point is the pagoda, in that opening photo, but the rest of the elements help tell the story of autumn, of a structure amidst trees, of red’s power to draw your attention.
Here is another shot of the same pagoda, taken on the same day from an entirely different vantage point.
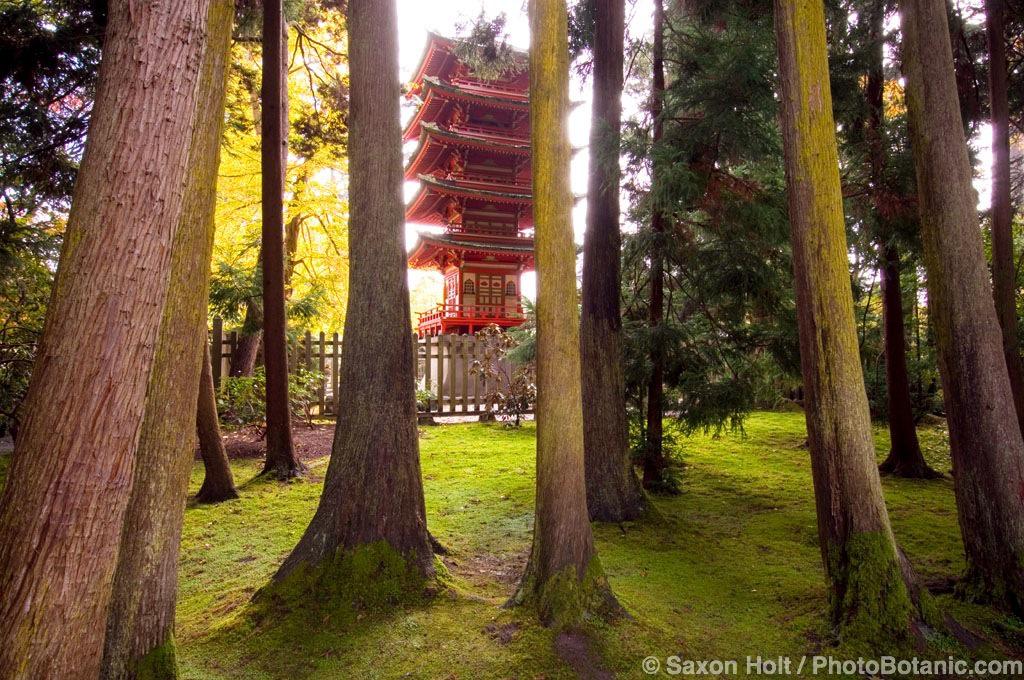
Bright light can also draw the viewer’s attention to a focal point. The photo above is well constructed, using framing techniques that we worked with in the last lesson, but the bright light of the sky also draws the eye, and the pagoda is well juxtaposed to take advantage of it. Bright areas in a photograph offer powerful ways to become focal points, whether you want them to or not. Always be careful with bright highlights, recognizing their potential to distract the viewer and pull the eye away from your main subject.
But, don’t be afraid to take advantage of the bright areas. Look back at the pale bark on the crape myrtle photo. It’s surrounded by yellow, it is light colored, and the branches offer structure—all elements that help draw the eye to it.
Readers of the previous lesson (Framing) will remember this next photo and the use of juxtaposition of elements to frame the focal point.
I hinted in that lesson that there were other tools, besides framing, that draw the viewer’s eye to the focal point. An eye-catching bright spot in a photo may also be a light-colored structure. This is part of the appeal of variegated foliage in a planting composition: the brightly colored foliage highlights help draw attention to their spot in the garden.
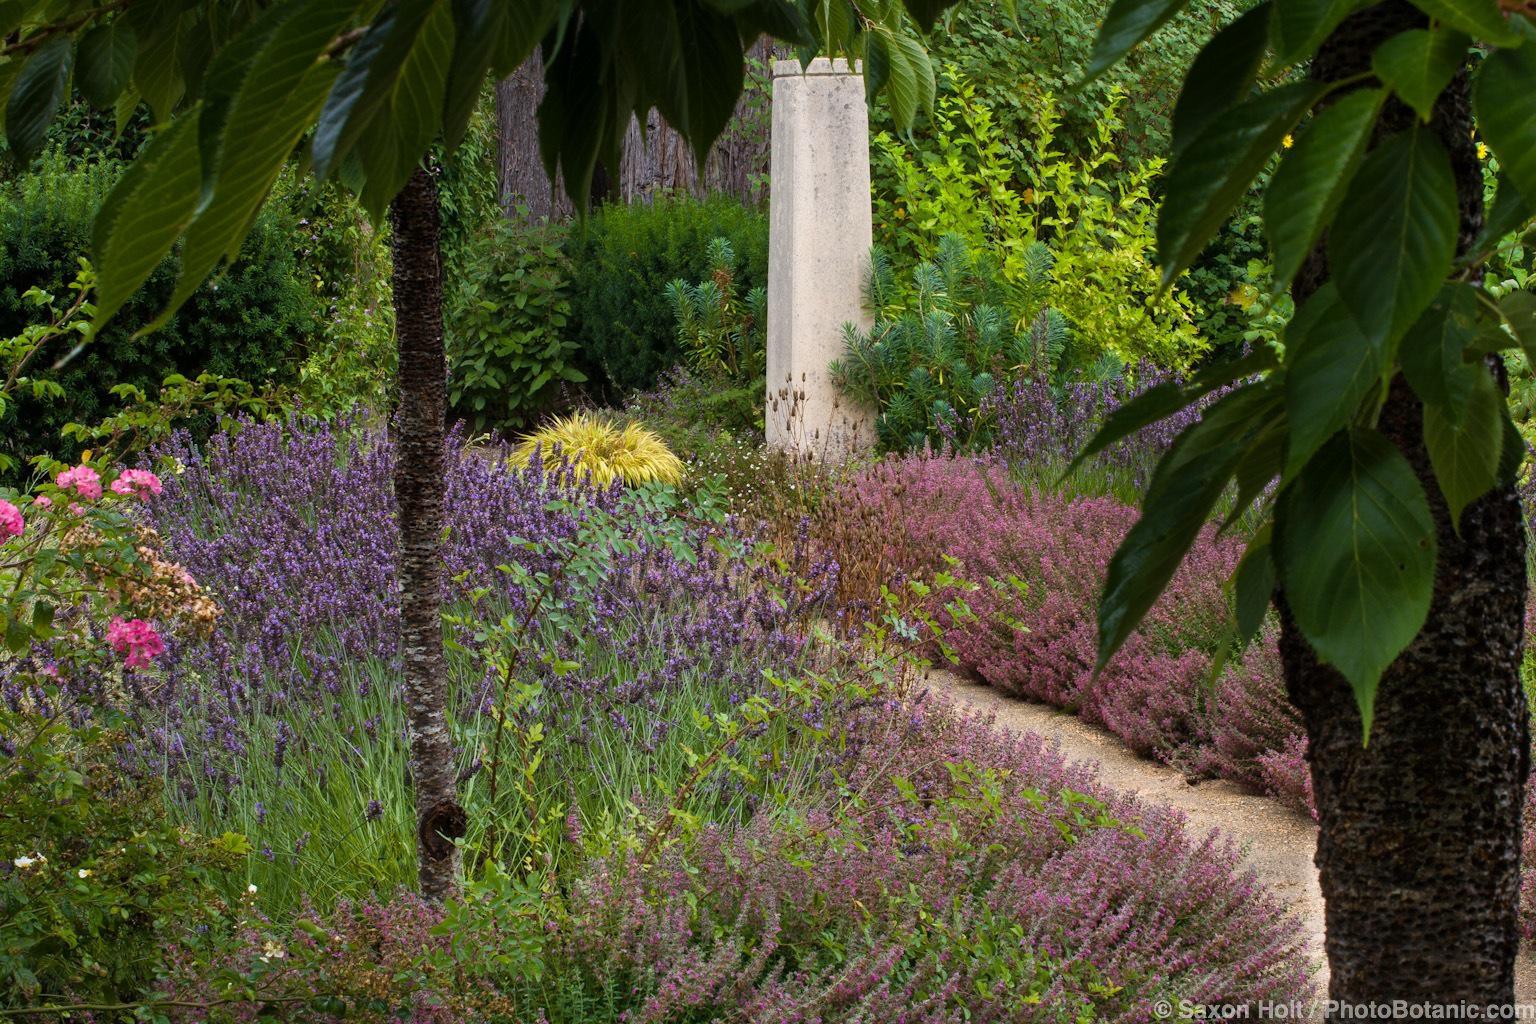
The white, rammed-earth column is the focal point in the photo above, not just because it is well framed between the trees or that it is the only structure in the picture. It is also the brightest spot, which the eye cannot avoid. It is the story. In the previous pagoda shot, the light area of the sky is a means for drawing the eye to the focal point; the bright area is the focal point.
In this next photo in Sherry Merciari’s garden, there is no way to avoid the focal point of the whimsical statue, “The Gift” by Vickie Jo Sowell.

While the statue attracts the eye because of its light color, it is also in a “sweet spot” of the frame. Back in the first section, when I introduced Balance (lesson 1.2) in creating a composition, I talked about the rule of thirds as a classic way artists organize the elements within a frame or canvas. The statue in Sherry’s garden is in the sweet spot at the intersection of the upper third and right third of the picture.
Here is another example of using the rule of thirds to help make the focal point equal the sweet spot.
The viewer’s eye is drawn to the bench in another of Gary Ratway’s gardens, even though it is only a small part of the photo. The story is not simply about a beautiful mixed border; it inspires the viewer to imagine what it would be like to sit on the bench in that garden. Various tools of composition are at play here to help the viewer focus on the bench. Remember that structures naturally draw the eye to rest on them; and that bright spots pull for attention. After a while, the more you study a garden, the more you will recognize compositional elements that help you see the focal point in your photos.
Another tool that draws your attention to the focal point in the bench photo are leading lines, which will be the subject of the next lesson. But, for this lesson, when you go out with your camera, search for photos that have a single focal point. Recognize the essence of the story and use every trick you can to point to that main subject.
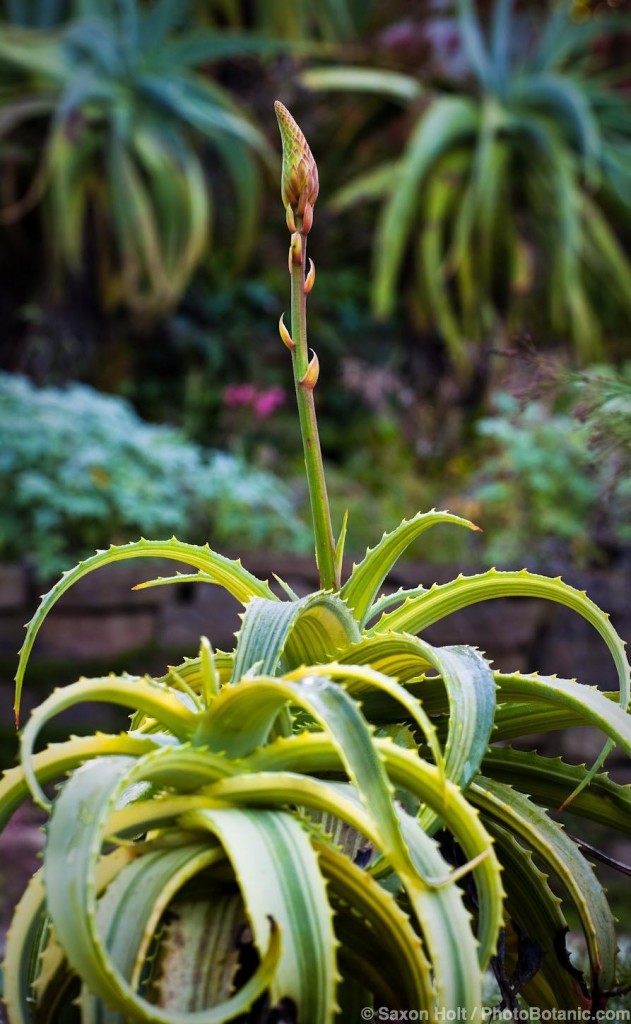
From one of my Focal Points workshop at San Francisco Botanical Garden, consider this Aloe in the South African Section:
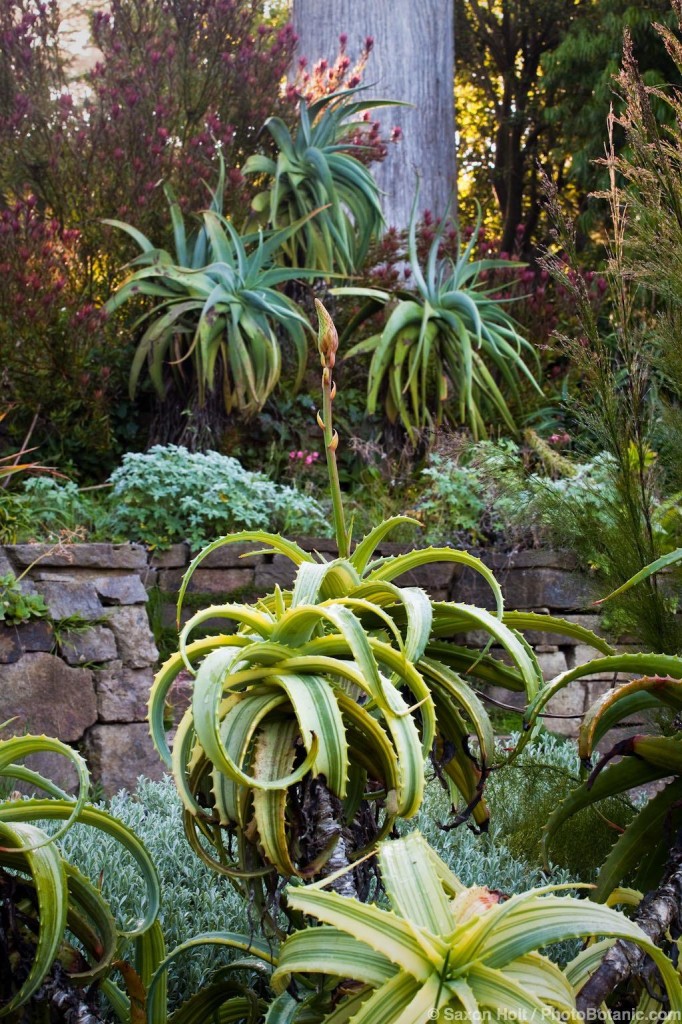
The structure of the wall is a distraction as are the bright hints of skylight. Even the gray tree trunk is a distraction and unnecessary for the story. If the aloe is to be the main subject, supporting elements around it should contribute to the story without overwhelming it or distracting from it. The close-up photo of the aloe does just that.
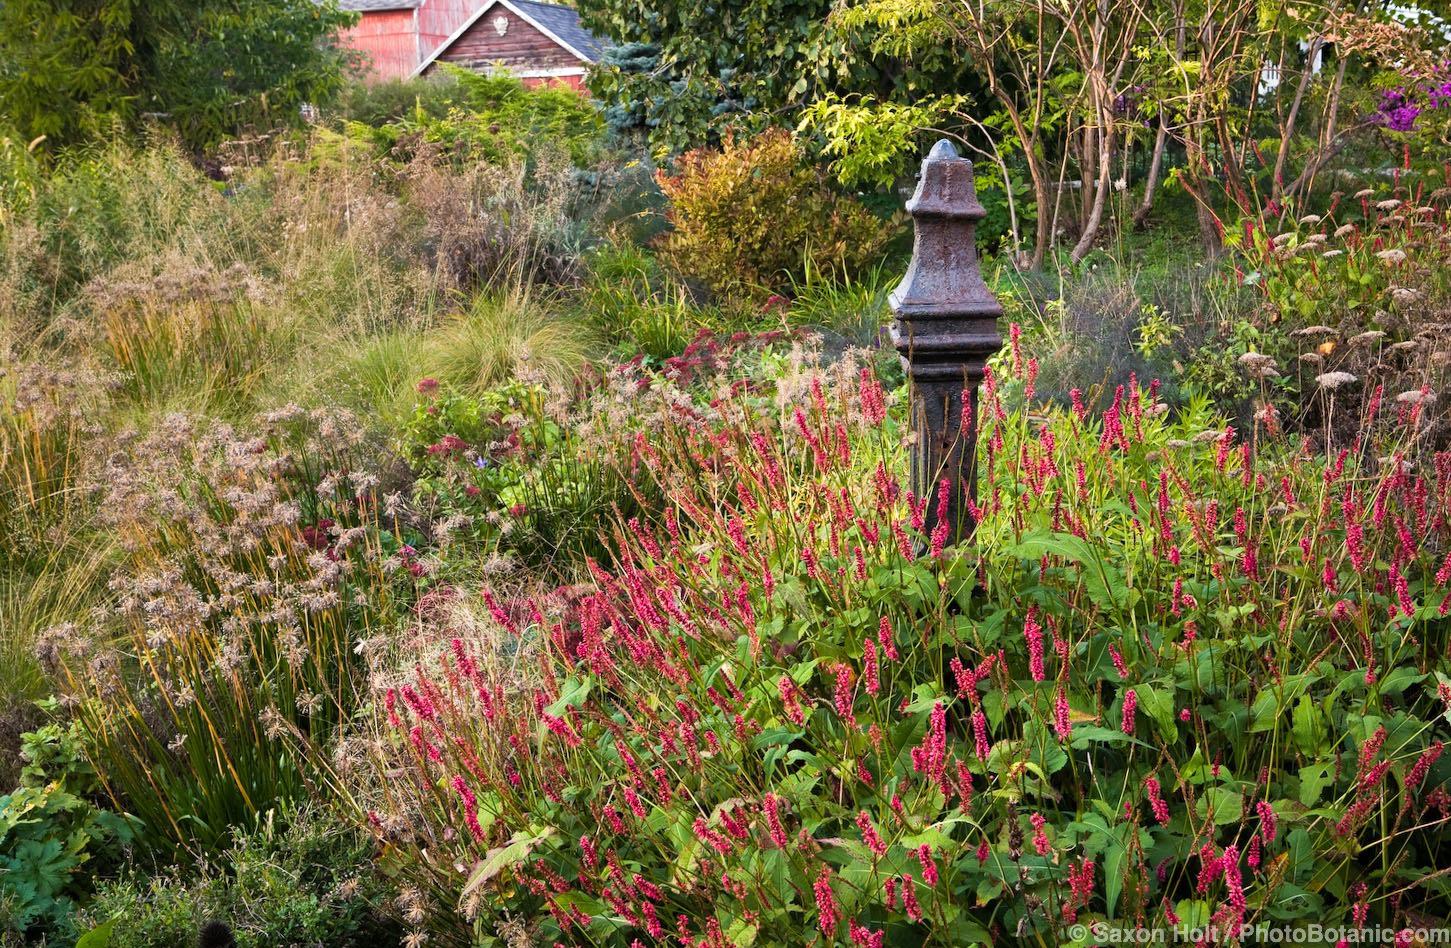
Now, grab your camera (and tripod) and go in search of focal points. I will leave you with a final photo from Northwind Perennial Farm that serves a dual purpose. It is no accident that the solitary post, the focal point of this photo, was intentionally placed as the focal point of the garden, designed by the gardener. Keep that thought in mind as you search for focal points in the gardens you visit.
In later workshops (Section Three), I will ask you to “Think Like a Gardener” when you choose a subject. Often a subject is right under our nose, and we take for granted what we assume others will see. Identify the focal point, and direct your viewer to see it, too.
Supplemental Posts

Leave A Comment