


We begin Composition 101 with one basic rule: fill the frame. Remember this primary concept every time you take a picture.
Each lesson in this book presumes that you are consciously composing with carefully considered elements to tell a story. Avoid wasting a composition with elements that do not contribute to your story. Use the camera viewfinder (or your crop tool later) to fill the frame. Later, we will talk at length about tools and concepts of composition; for now, start by thinking of your camera viewfinder as an artist looks at a blank canvas.
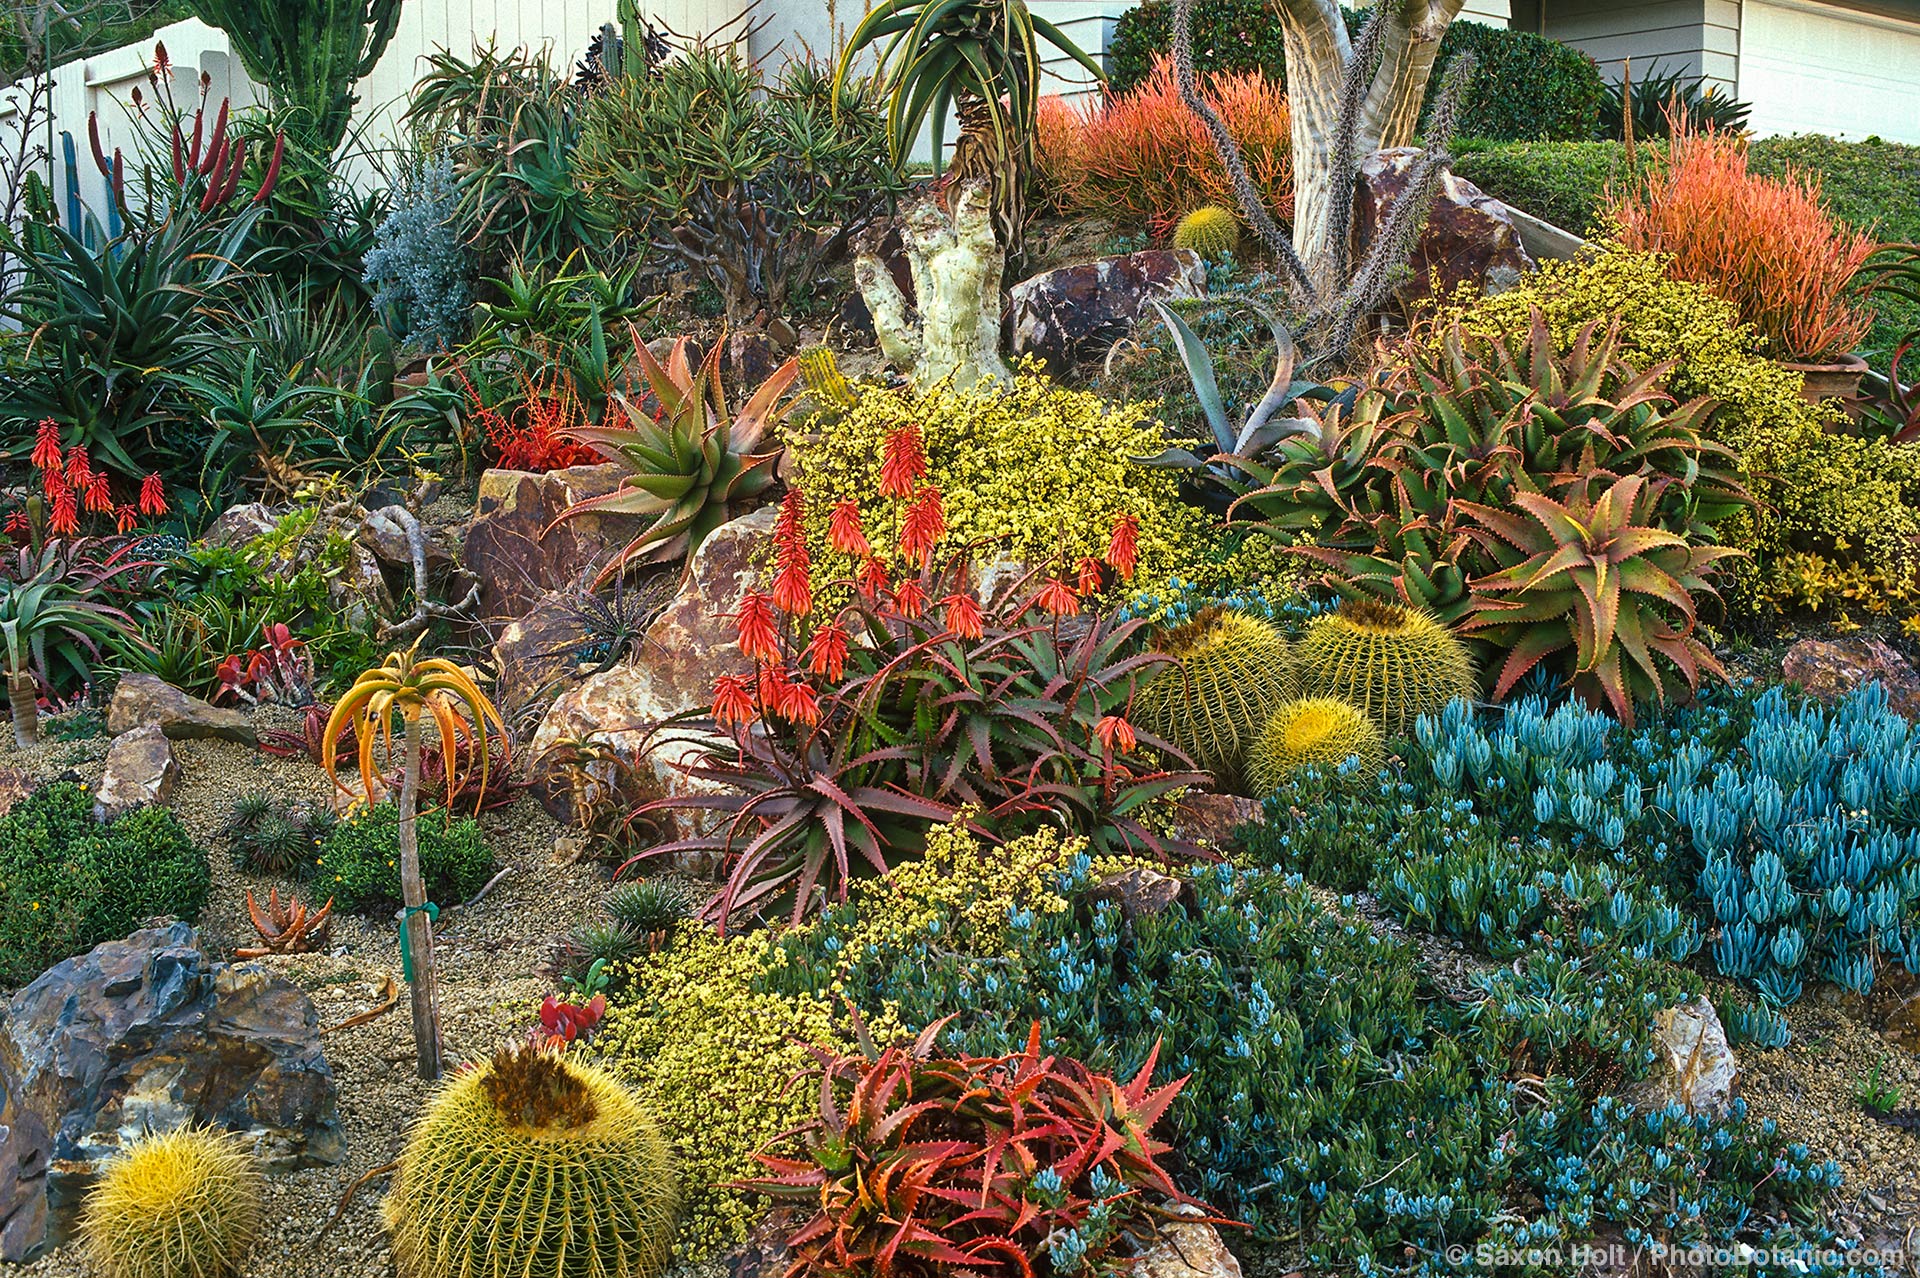
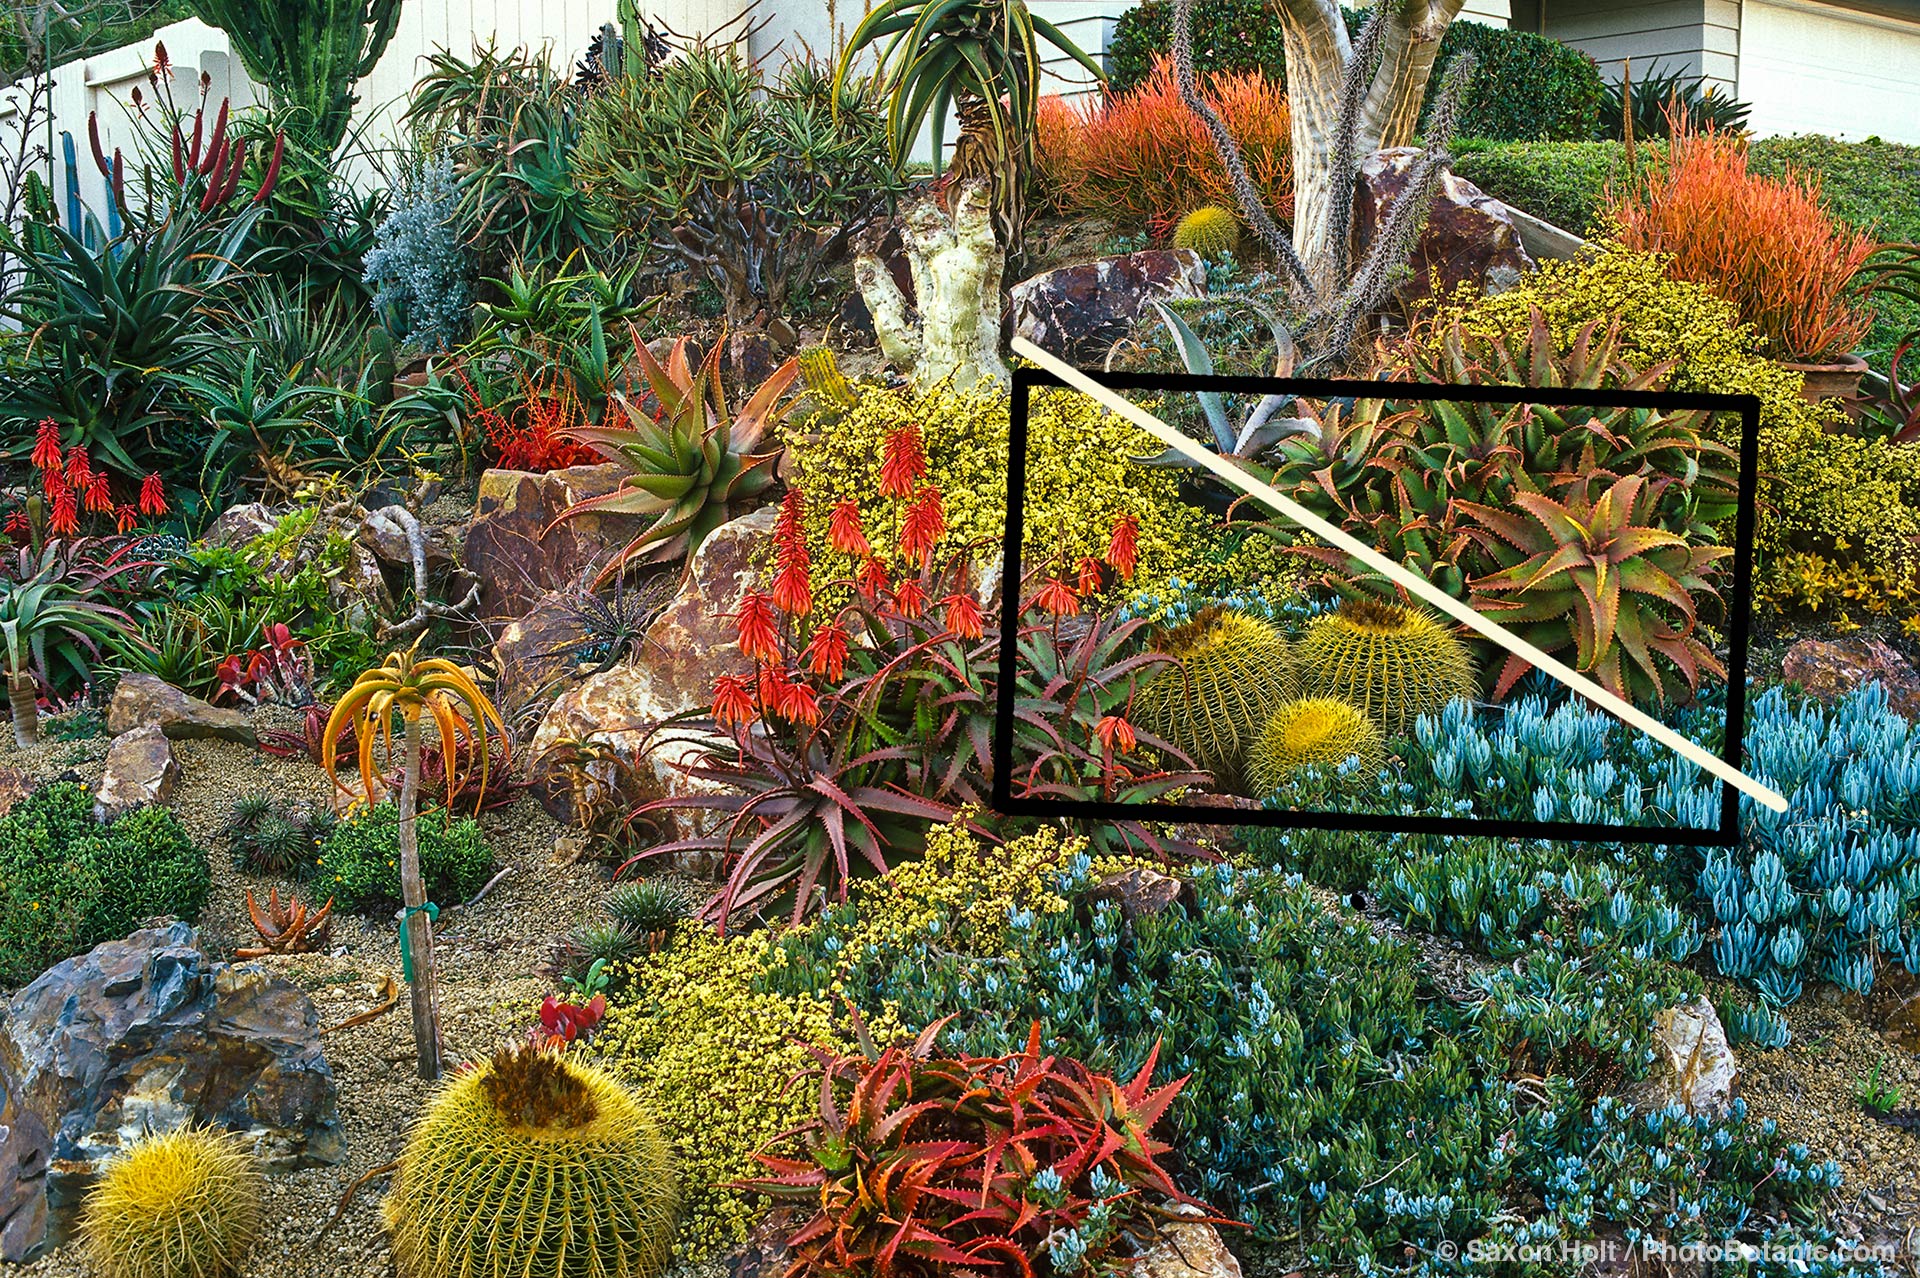
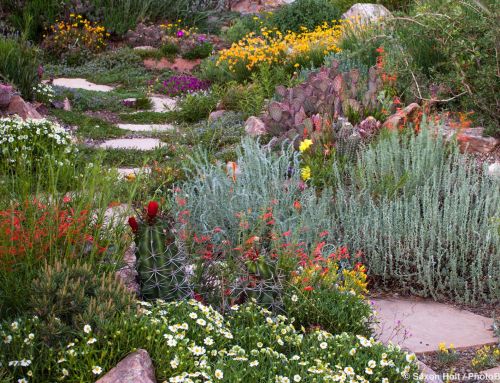
The opening photo (above) shows a succulent garden tapestry in the garden of Jeff Moore, owner of Solana Succulents in California. It has become one of my favorite compositions, as it illustrates a lot of good ideas for the use of shapes, colors, lines, balance, and the rule of thirds. But, fundamentally, it fills the frame.
This is the garden as I first saw it:
It’s an interesting snapshot that documents the garden, but I want good photos, not mere snapshots. As I stand in this exciting garden, trying to determine what inspires me about it—what captures my attention. I know I want to show a lot of different shapes and colors and to create a tapestry of textures, using the entire frame of the viewfinder.
A famous street photographer, Robert Capa once said: “If your photos aren’t good enough, then you’re not close enough”. Simply said; Fill the Frame.
A street photographer often needs to get close simply to engage with the subject, garden photographers can’t or, more often, are not allowed to get closer. But we have the luxury of changing lenses to get closer.
I begin to see the real essence of a story by composing in my viewfinder when I switch to a telephoto lens. In this larger image, the black rectangle, representing the view seen through a longer lens, identifies the image that I feel tells a story:
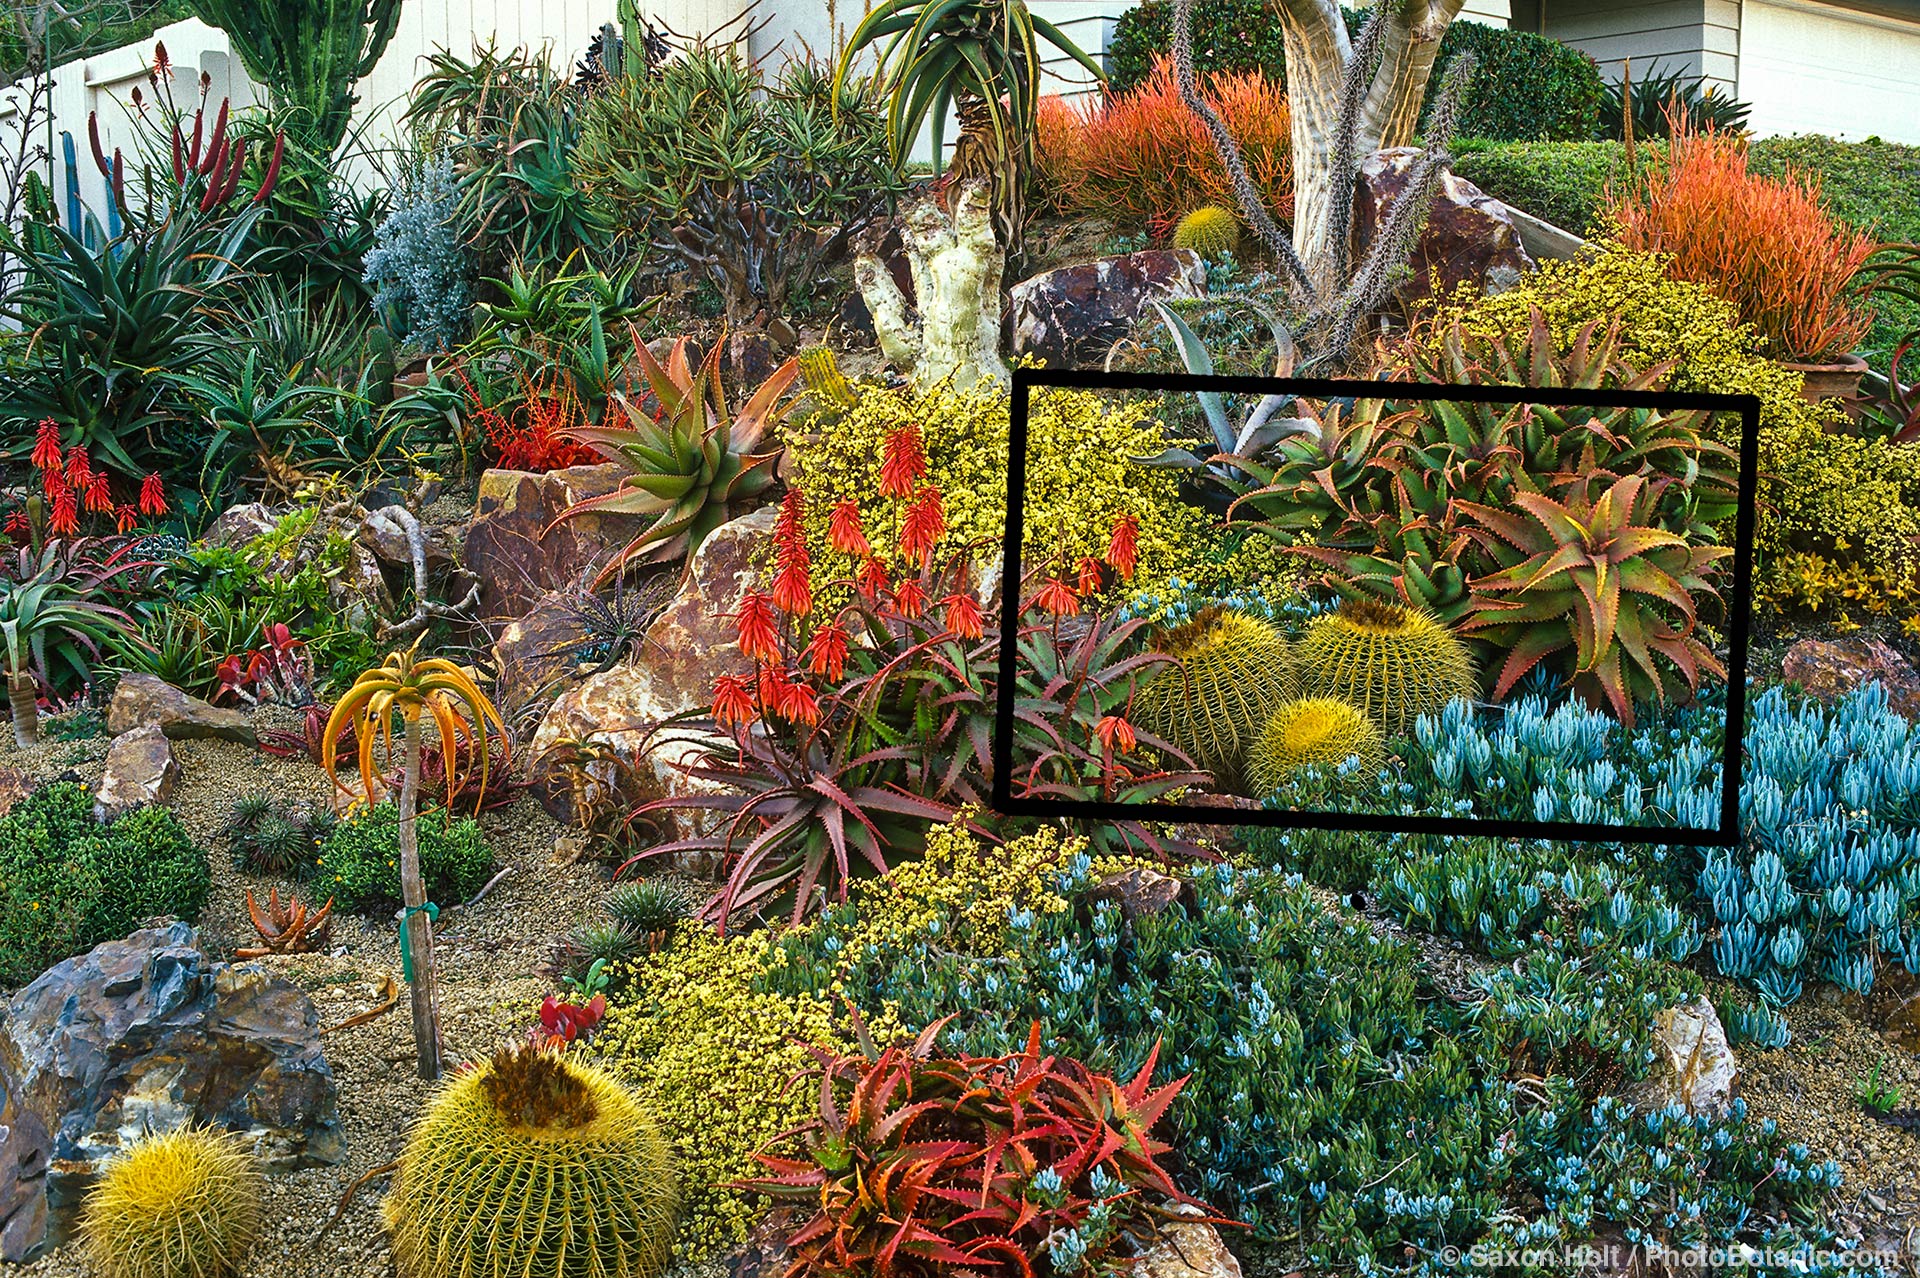
Often, moving closer to the scene will eliminate distractions and isolate those elements that excited you. Use the full camera frame and fill it before you snap the picture. Filling the frame with only what tells your story is the first step to a strong composition.
I will use more of this particular photo in the next lesson, when we begin to explore the theory of composition. For now, let’s take a look at another garden and find a composition that fills the frame—edge to edge and into every corner—and tells a story.
A xeriscape garden in New Mexico I used in The American Meadow Garden:
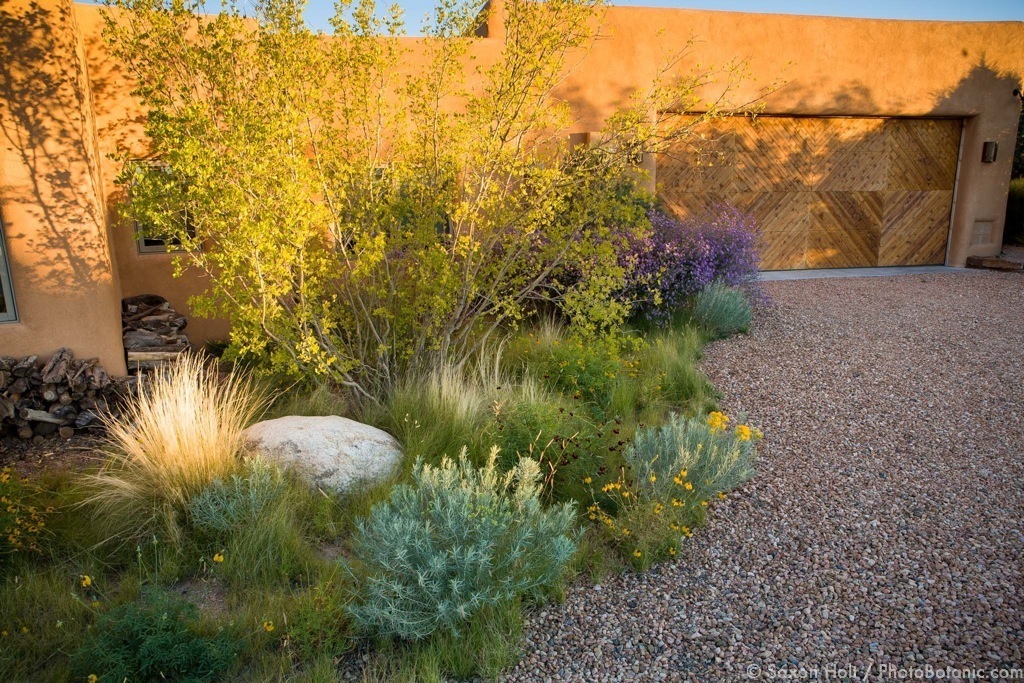
As I study the garden, I think about what I am really seeing, and what I really want to show. To get to the key elements, I moved in tightly and filled the frame with just those precise things needed to tell the story for the meadow book.
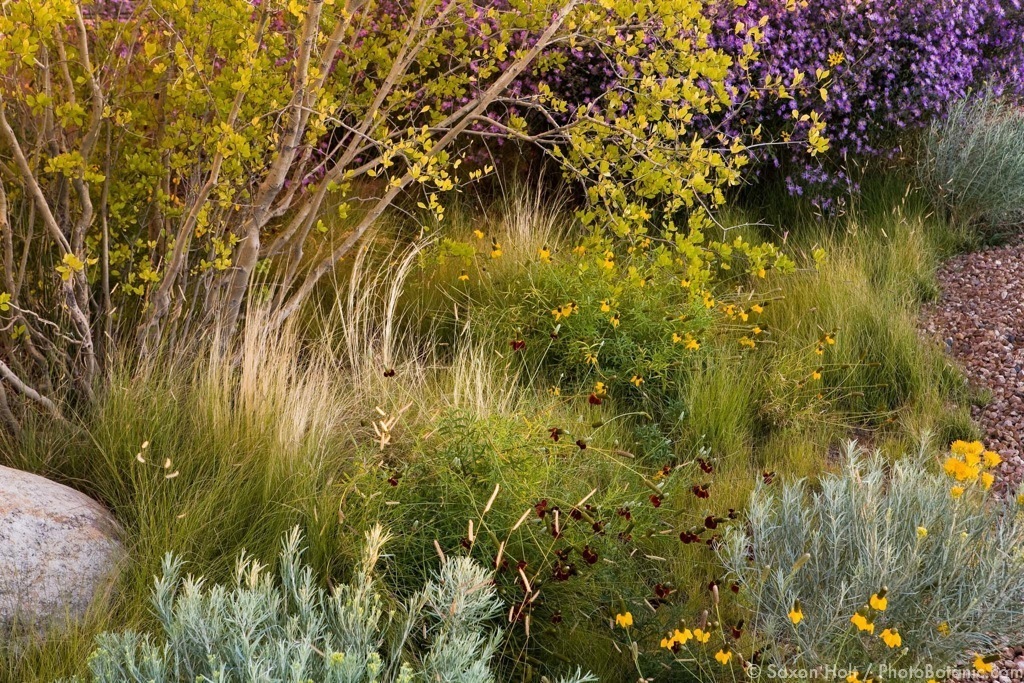
Just as in the succulent garden photo, I filled the frame with the story. The grasses were key to the meadow theme, but I included a bit of the gravel driveway, an accent rock, and enough of the shrub to provide context and scale. The actual edges of the frame within the camera define the full composition, every element within those four edges must contribute to the composition that fills that frame.
I highly recommend using a tripod for serious landscape and garden photography. A tripod allows you to improve certain technical aspects of a photo (more later on tripods), and it almost forces you to think about the key elements of your story; the result is a better composition.
In this next example, I was studying this scene, camera on tripod, working on a story about groundcovers. I was Working the Scene – from a previous blog post.
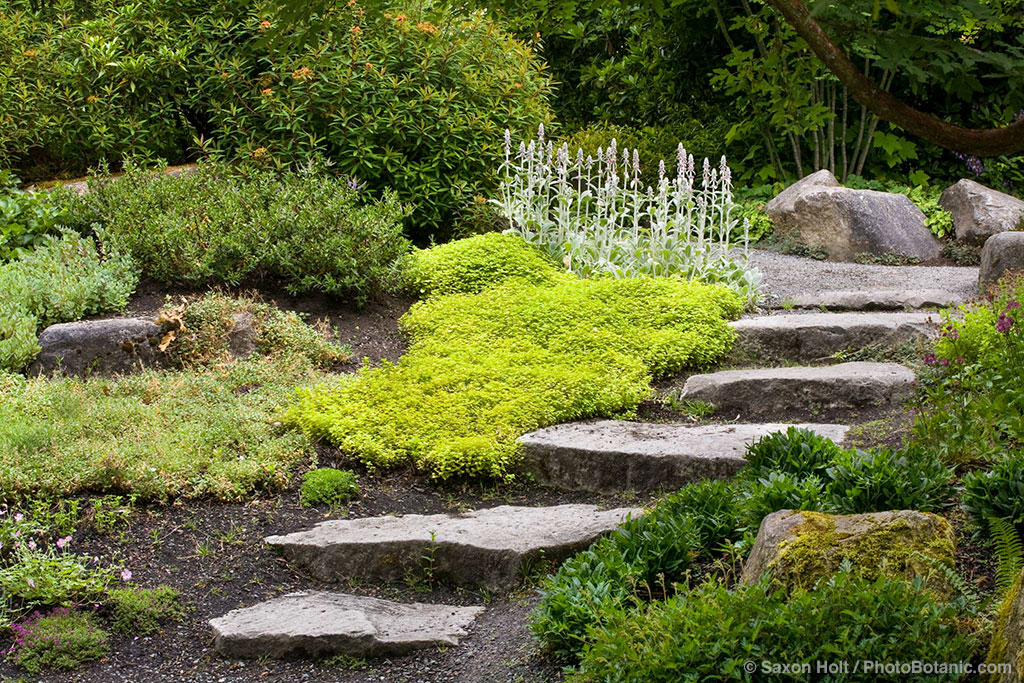
This first photo is a pretty good wide view, using every part of the frame to tell a story about the stepping stone path and context, but as I worked the scene I found a tighter composition, a bolder photograph, less wasted space, better shaping and blocking.
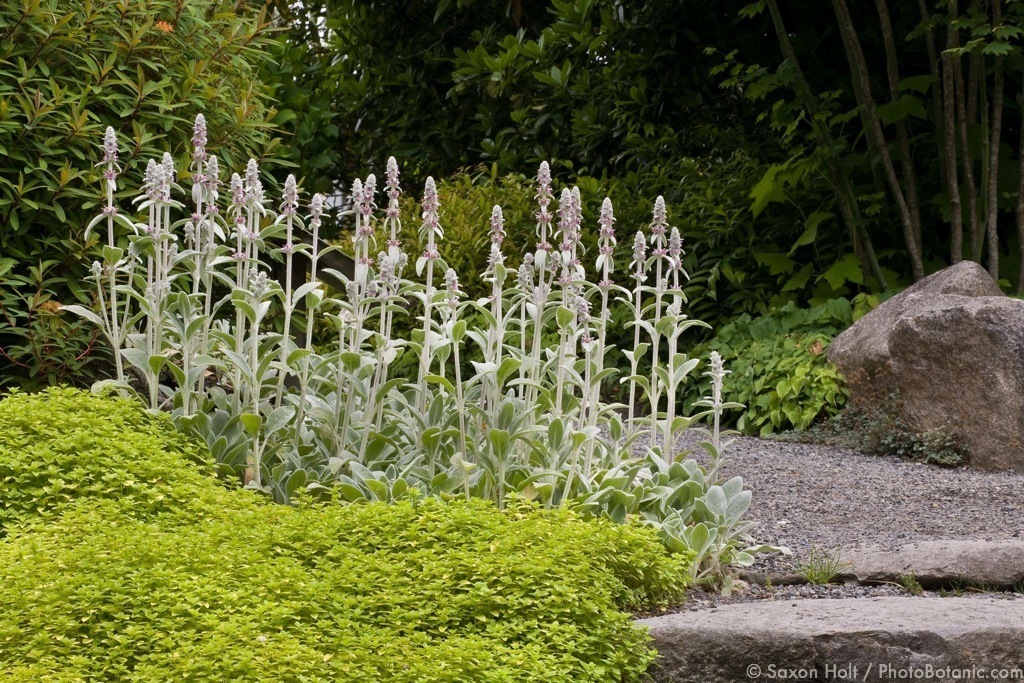
Again, note every part, every edge and corner of this is part of the full composition. Carefully setting up this angle, looking through the camera on a tripod, is fundamental to getting just the right balance and in deciding which elements to include in the frame.
Later, I will go into much more detail on the elements of composition, especially in Book 2; for now, I want you to begin to see a composition as being filled with blocks of space—the blocks needed to fill the frame—like pieces in a simple jigsaw puzzle.
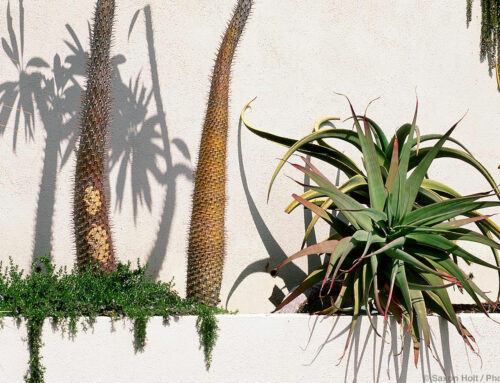
Seeing a frame as filled with blocks of space can be better understood when we consider the use of negative space as elements of composition.

In the leaf picture, notice how the dark areas with nothing in them, the negative spaces, are critical to creating this composition. In later lessons we will discuss shapes as elements of balance in a photograph, and negative spaces are certainly shapes to be used, but here we are talking about filling the frame.
Note how important the four edges of a picture are to defining the frame to be filled, how the frame itself and its hard lines contribute to the shapes within. Your camera gives you this readymade composition tool, a readymade canvas – the viewfinder with its four sides.
But don’t get stuck thinking a picture’s shape must be defined by the camera frame. Sometimes, a composition will fit into a square or panoramic (much wider than tall) format.

The standard rectangular image in the camera frame can be cropped later on the computer. I framed this tulip field as a panorama, placing the most interesting and important elements in the middle of the camera frame; later, I used the crop tool to adjust the shapes to fill the finished frame with a balanced composition.
Your picture is not limited to what you first see in the camera frame. Sometimes, I lock the camera down on the tripod and build the composition. This can happen in photo shoots that are styled, where furniture and potted plants might be added to fill out a composition that needs a little something extra. (See a short blog post about “Stuffed Photos”.)
There is always the opportunity to embellish what you see in the viewfinder when you are doing close up work with a macro lens, by adding an extra flower, moving a leaf, or adjusting a twig.
As an example, I built this camellia composition after being disappointed by the “empty” space in the composition. I locked down the camera on the tripod and went from a composition that did not seem full to one that did, by embellishing the composition with additional flowers in the background.
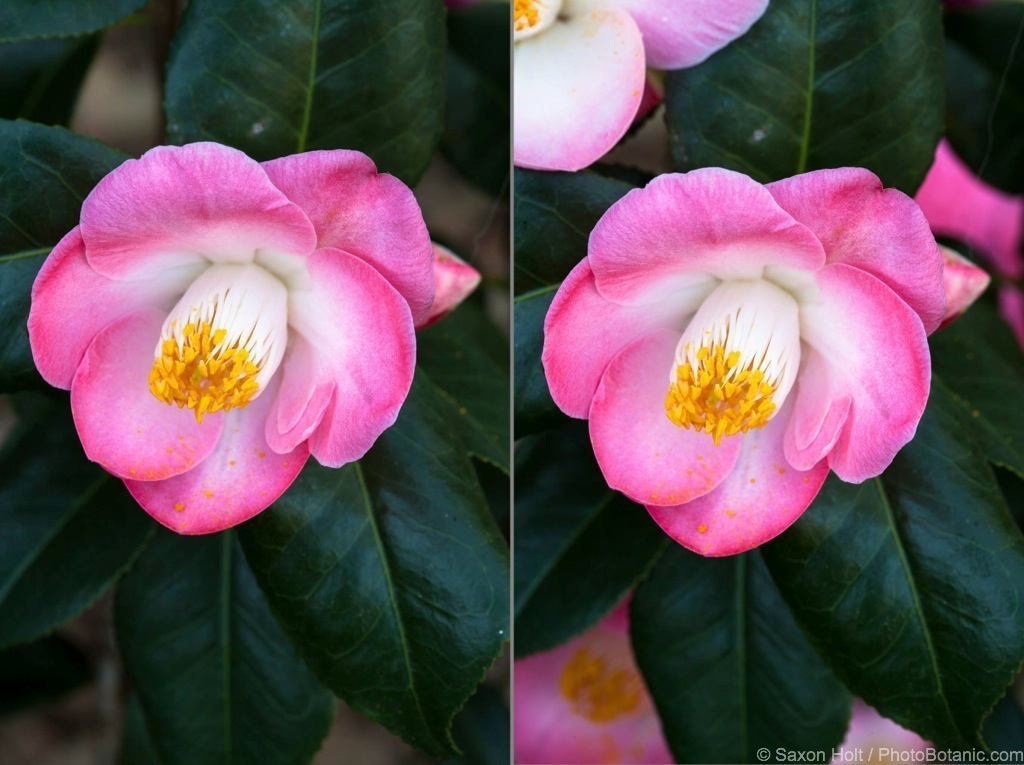
This sequence is documented in a previous post “Fill the Frame – Tripods”.
As we move deeper into the book, past composition and “Good Garden Photos,” to “Think Like a Camera,” “Thinking Like a Gardener,” and “Cameras and Computers,” we will always use the concept of filling the frame as the fundamental understanding of what makes a good photo—whether of a garden or any other subject. We will discuss many techniques and design concepts, talk about what we see and what the camera sees, and study garden themes and camera controls, but all of these notions must fit between the four edges of the final frame.
Composition is king.

Look at the garden with your camera, not just your eyes. Let it help you fill the frame.
Next: 1.2 Composition – Balance.
Analysis of what makes a full frame composition work.
Additional posts for Fill the Frame. Lesson tag 1.1
“Fill the Frame Basics” – More examples
“Fill the Frame – Tripods” building a macro photograph.
“Working the Scene” – Framing what’s important to your story
“Fill the Frame Workshop” – Fill the frame with what you really see


Saxon,
These images make it clear to me how much more interesting the garden story is when the frame is really ‘filled’. It seems like really great garden stories are told with close-ups more than landscape images – is this your experience?
The other thing I notice is that filling the frame draws a lot more attention to the colours in the composition. I think that this ‘cropping’ approach would be useful in improving my own garden plantings.
I’ve just gone through some of my pictures of Whistling Gardens in Willsonville, ON). I improved some right away with cropping to fill the frame. And I can see what to do next time I’m there for better pictures in other areas.
Thanks so much,
Marilyn
Marilyn – I really don’t think stories are told better with close-ups unless the story is only about a plant or simple vignette. Photos are often made much better when you move closer up to the scene and frame only the key elements, but a garden IS a landscape. Often that is an important part of the story.
And, oh yes, cropping almost always makes a better, tighter photo. Even photos you think are well cropped when you take them, still need a bit of cropping later when you see a few things at the edge of the final photo that you did not see in the viewfinder.