[MM_Access_Decision access=’future’]
Learning how to read the quality of light is the single most important skill in good garden photography.
You will get access to this on week 3…
[/MM_Access_Decision]
[MM_Access_Decision access=’true’]
Learning how to read the quality of light is the single most important skill in good garden photography. Even a good composition will fail if the light is bad. Photographers talk about “The Light” in reverential terms. It is the lifeblood of outdoor photography, no less than it is the lifeblood of plants for photosynthesis. Garden photographers have different challenges with light from those of other outdoor photographers. We generally need a soft light for the detail of plants to show well in our photos, whereas photographers who capture canyons and waterfalls, buildings and barns, or clouds and sunsets use light differently, often taking advantage of a harsher light to dramatize forms.
When the light is good, pictures come easily. When it is bad…it’s best to put away the camera. The worst light for garden photography is found on bright sunny days, where the contrast between sun and shadow is so strong that the camera will have little success seeing what the human eye is able to see.
Camera sensors cannot process light as effectively as the human eye. We might look at a bright, sunny, colorful scene and be excited by the range of light. We can see details in the bright colors, but we can also see details in the dark shadows. The sensor in the camera lacks that same dynamic range. It must favor one range—either bright highlights or dimly lit shadows—over the other. There are tricks that allow us to improve a camera’s range, such as using a High Dynamic Range (HDR) that merges multiple exposures, but it is always preferable to start with good light than to try to fix bad light.
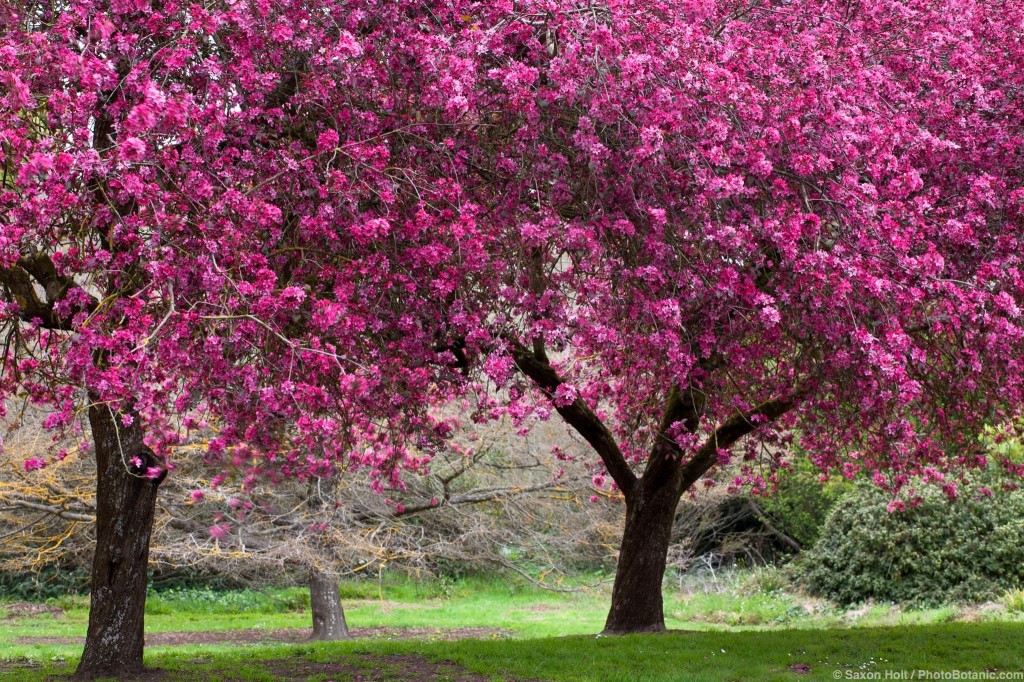
Here we see how waiting for an overcast day made a huge difference. The clouds in the sky acted like a huge soft light, surrounding the garden with even illumination, opening up the shadows, and enriching the colors. Overcast or foggy days generally offer the garden photographer the best light, since the camera can capture the entire dynamic range of light available. Low, dense, soupy fog is troublesome, but a high overcast of any kind is ideal, a “softbox” in the sky. (A softbox is a term for a studio photographer’s light source, a light box).
Colors will come true on cloudy days (such as the magenta flower of this ‘Liset’ crabapple), light tends to surround the garden, and the photographer can work on many perspectives back and forth through the garden. When the fog breaks and clouds are dissolving, there are often a few moments of spectacular light, where the garden almost looks sunny but with enough diffusion in the sky to reduce the contrast between bright and shadowy.
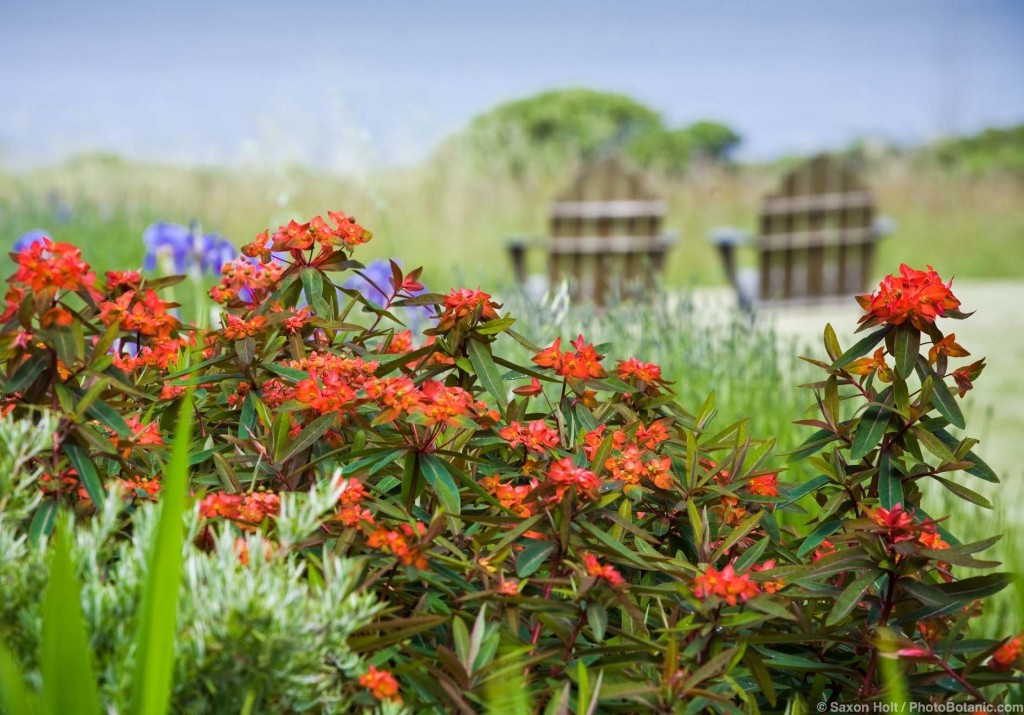
This photo was taken just an instant before the fog dissolved in a coastal garden. The Euphorbia ‘Fireglow’ was surrounded in soft light, but strong enough to make the orange flowers pop.
Overcast skies can be just as effective as foggy days, but beware of partially cloudy days. On days when the sun momentarily hides behind a small cloud in a blue sky, the resulting light will not suffuse the garden and will be flat, bluish, and dull.
You don’t have to wait for a cloudy day to get some decent garden photos; just be sure to avoid the hot mid-day sun. On clear days, early morning and late afternoon offer classic “golden hours,” when the sun casts soft golden hues on the garden. The dynamic range between the shadows and highlights is much less, so the camera can register more detail overall.
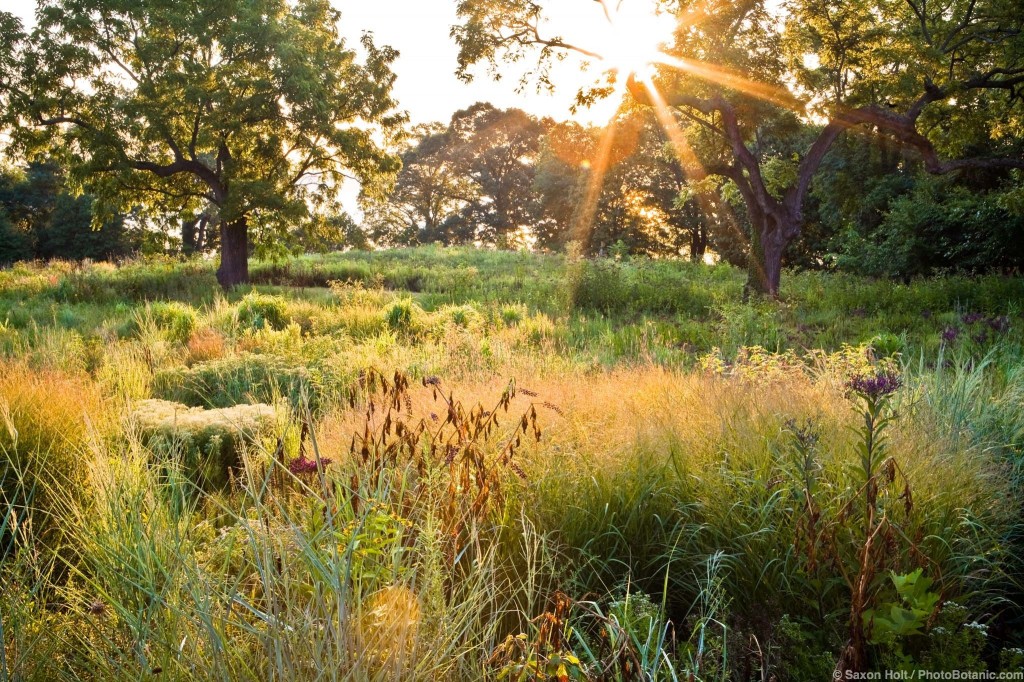
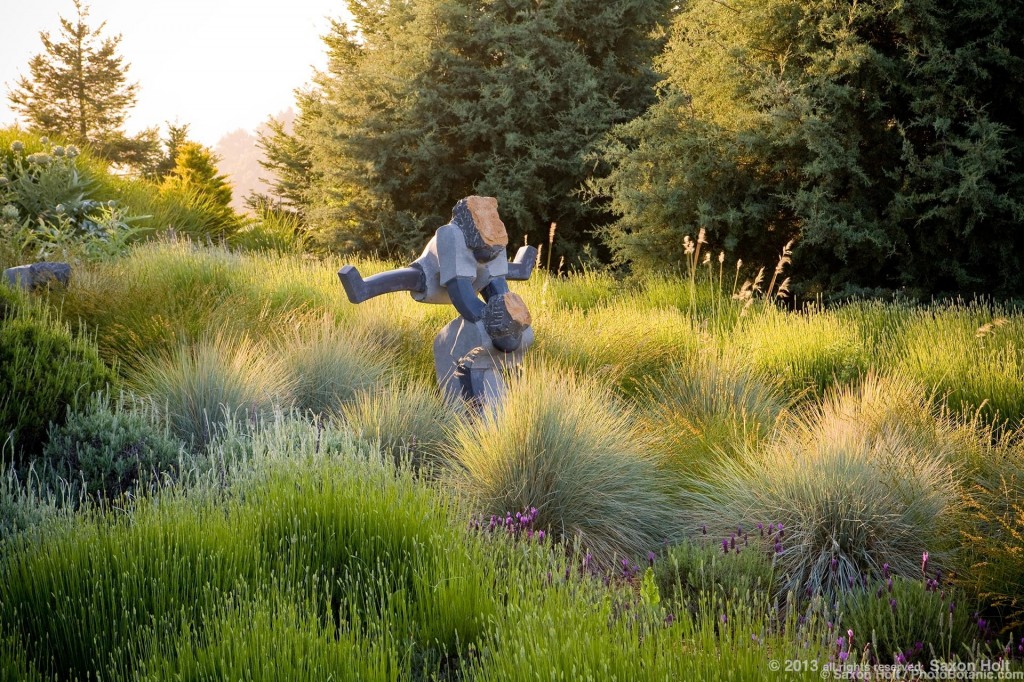
In this meadow jumper photo, note how the late afternoon sun illuminates the entire scene, without overwhelming it, and there is detail across the entire range.
When planning a garden shoot, I prefer dawn; both the air and the color of the light are clean, the plants are fresher, there is usually less wind, and the quiet of the morning can open up one’s own creative sensors. The first hour or two of daylight is best.
Unfortunately, it can be difficult to get into a garden before dawn, in order to be ready for the light. The light changes rapidly after sunrise, bright areas suddenly appear, and the harshness of the light increases by the minute. If you do plan a morning shoot, expect to retreat into shady areas to get a softer light without the strong contrast of the sun. (See New Mexico garden in lesson 1.1)
More often, you will need to seek out shady areas to get the desirable soft light. The shadows created by buildings, walls and hedges, and wooded areas offer an even light. This light will have a bluish cast to it if you have open sky above your composition, but you can set your camera’s white balance control to help overcome this. (Book 4 will deal with camera and computer controls.)
While the front of this home was in hot morning light, the rear garden was shaded by the house. Be careful in the high shade of tree and woodland gardens on sunny days. Speckled light under the canopy can create an annoying distraction. Even the smallest number of bright sunspots in an otherwise shady photo will destroy a composition and confuse the balance of a photo. If you shoot in the deep shade of a wooded garden, you may find a green bias in your images.
Garden photographers don’t often need to worry about artificial light, but the wavelength of light emanating from light bulbs ranges from yellow for traditional bulbs, to greenish for many fluorescents, to orange of some street lights. The human eye is able to compensate for the color of light but camera sensors cannot.
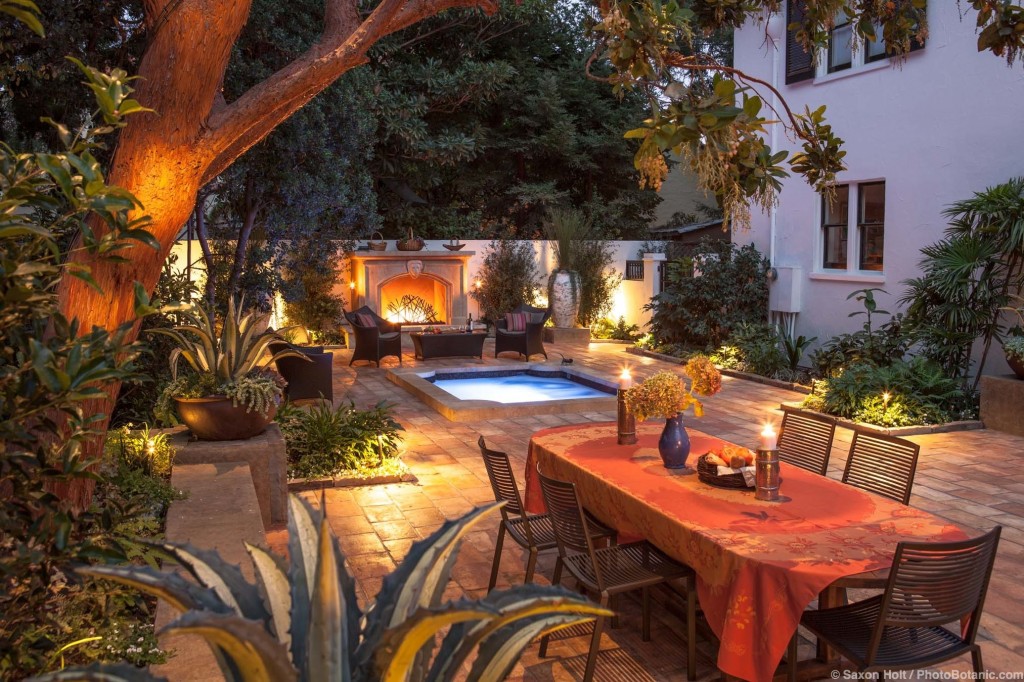
The ambient light is dull and cool at twilight in this patio garden, but the garden lighting adds warmth.
This is a good opportunity to explain the color of light. The sun is “daylight” colored (technically 5200º Kelvin), but many factors may affect the actual color wavelength that bathes a particular scene. For instance, the daylight color of sunlight coming through a stained-glass window is modified by the different colors of the glass in the window.
Before digital cameras, photographers used different types of film and a variety of color filters to compensate for different kinds of light. Now we have smart cameras with white balance controls and computer tools to change the color cast to whatever we choose. (See Book 4: Camera and Computer).
Whatever time of day you shoot, learn to recognize that the color of light is an important part of its quality. Daylight passing through a forest canopy will pick up a lot of green color; sunshine passing through atmospheric haze can gain red; and open shade is often bluish, because it is illuminated by the sky without the warming color of the sun’s light.
Late afternoon is the other “golden hour” with soft light and golden hues. The harsh light of mid-day has lost its sharpness, and the dynamic range between highlights and shadows falls within a camera’s range. A great advantage to working in the evening is the opportunity to become more familiar with the garden—assuming you have arrived in time to scout around. The light gets better and better, and often warmer and warmer, as the sun begins to set.
Surprisingly, twilight, the light after the sun goes down, can also be great for garden photography. Not only is it soft, but the quality of light is excellent. Colors will render really well. The blue color in the sky disappears and turns almost white, like an overcast sky.
You will need a tripod to take advantage of twilight, since low light means long shutter speeds, but the color of the light is excellent for garden photography.
This photo of Cornus kousa was taken after the sun went down using a two-second exposure on a still evening.
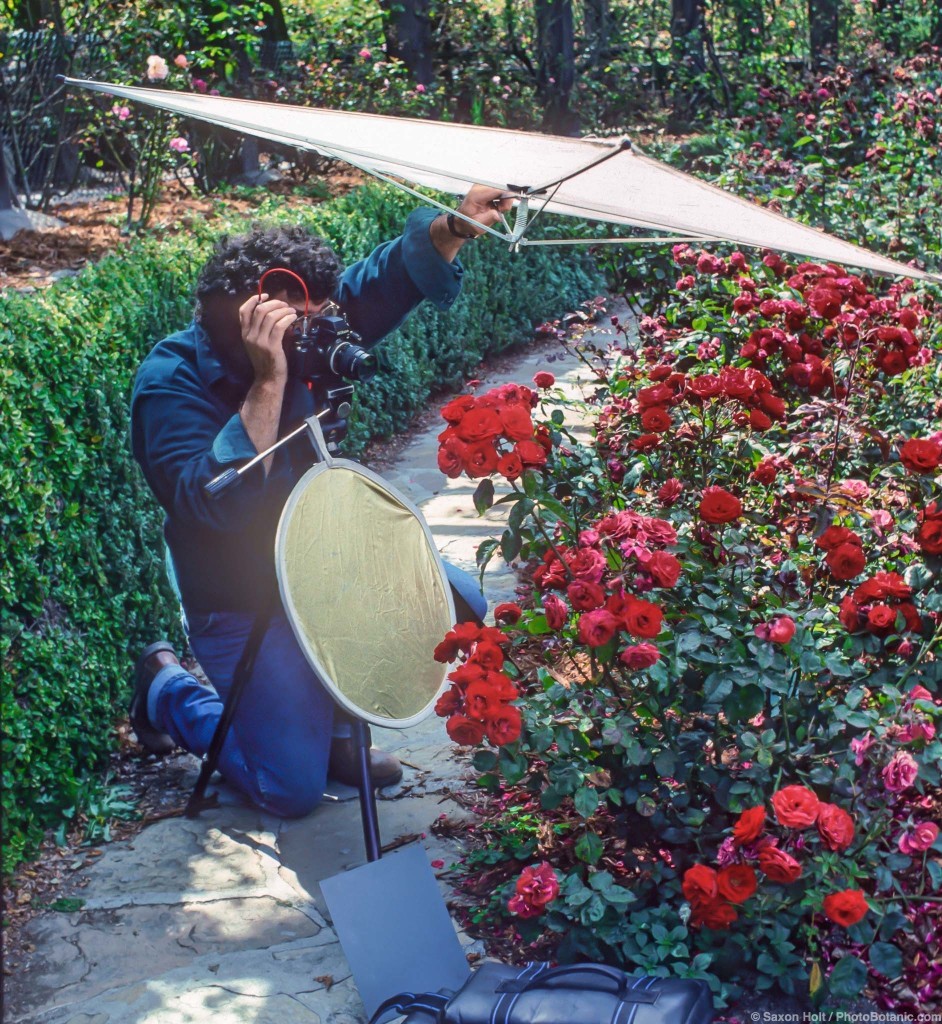
On those sunny days when you are stuck with bright light, you can still find ways to soften the light for detail shots with a small portable scrim—a semi-transparent fabric similar to parachute cloth. These are often sold as discs that fold up compactly; they will become part of your indispensable gear, along with a tripod and extra memory cards. A scrim held over a bright sunny flower will soften it miraculously, as with the images of a rose below.
It’s important that the scrim is big enough to soften the light beyond the subject as well, so that no bright highlights glare through. The larger the scrim, the larger the area that can be covered. Here, this large agave in a desert garden sits fully within the area protected by a large scrim.
Sometimes it may be advantageous to add additional light by using a reflector to bounce some fill light into the composition. In the shot on the right, after softening the light with a fold up studio umbrella as a scrim, I used a gold reflector to add a warm fill light to the bold leaves.
The key is soft light. Whether you make it yourself with a scrim or look for it in the golden hours of the day or on a cloudy day, good garden photography depends upon good light. We will revisit this subject repeatedly throughout the book., “Light makes photography. Embrace light. Admire it. Love it. But above all, know light. Know it for all you are worth, and you will know the key to photography.” George Eastman
Additional posts for Light. Lesson tag 1.3
Light Kisses – Revel in soft woodland light
Photos on the Road – Sometimes all you have is hard light.
[/MM_Access_Decision]






Leave A Comment