


 On my way to work this morning, during that 20 step slog between the house and my studio, I stopped to admire the Ribes sanguineum, the queen of California’s native shrubs.
The full fat buds are at their peak and bees were already at work. I grabbed my camera and began studying. I often look for a way to isolate a branch of my plant subjects and this one was proving hard. The shrub is right next to my office and the background was busy.
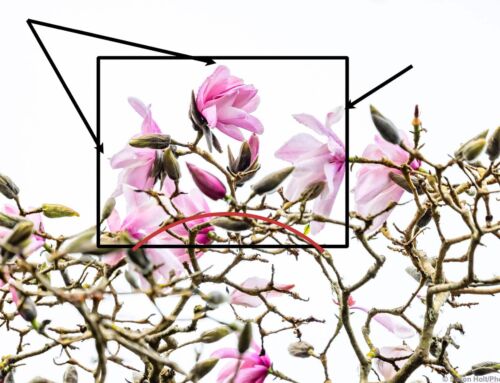
When I walked around to look back and up to the sky, I found a way to isolate a section so that I could create a silhouette. But as is often the case when the camera is pointed at the sky, the light meter is fooled and the image is underexposed.
This happens because the meter thinks everything it sees is an average gray. When something is very bright or white such as snow, a beach, or the sky the meter makes wants to make it darker. I find I usually have to fool the meter and add 2-3 stops to make it right.
Before and After Slider


The corrections can certainly be done later in post production but the quality will suffer, which is what has happened in this example. In the before and after image I used only one photo, the darker one, and showed how it needed more exposure to bring it to life. I wanted to use only the one image so that the two photos would align perfectly but the lighter version has acquired some “noise” and loss of detail. The shade details in the underexposed file do not have the same information as a properly exposed image.
However. I am not done. It is now the next day. That photo is not done; it needs more work to express my study.
Before and After Slider


Increasingly, I am using painting techniques to transform the image. In these, any noise problems of the photo file disappears, and I get pure image. Or partial image, as I decide what I really want to say about the Ribes.


Leave A Comment